To connect Checkout Everywhere with WooCommerce, you’ll need to create a unique Bolt user with permissions to read and write orders. The instructions below will walk you through creating that user and filling in the required information in your Bolt Merchant Dashboard.
Before You Start
This guide assumes you have already signed up for Checkout Everywhere, Bolt Checkout, or Bolt Ignite via our onboarding form. If you have not, please follow the instructions here or go straight to the form.
Step 1: Create User for Bolt
- Click Users, then Add new.
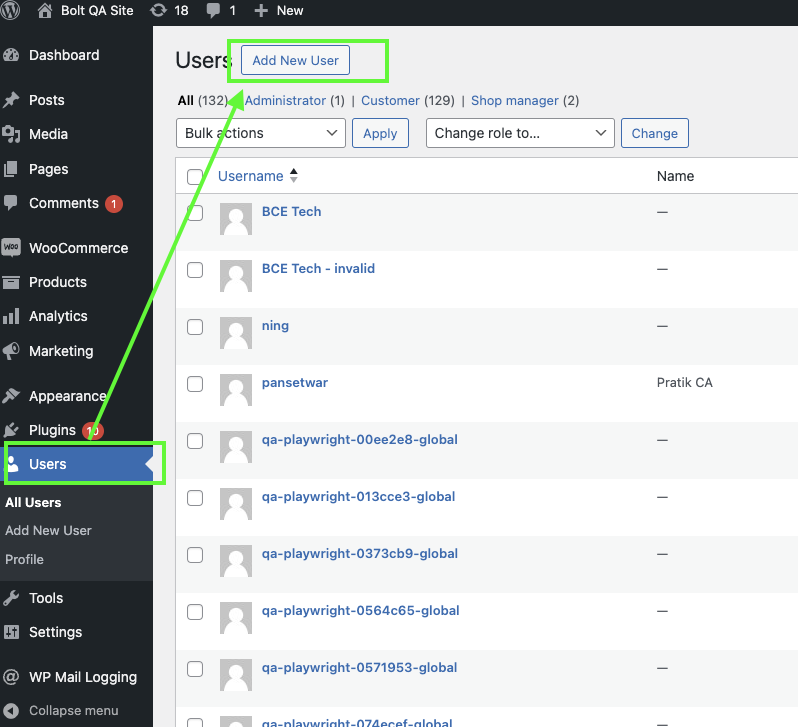
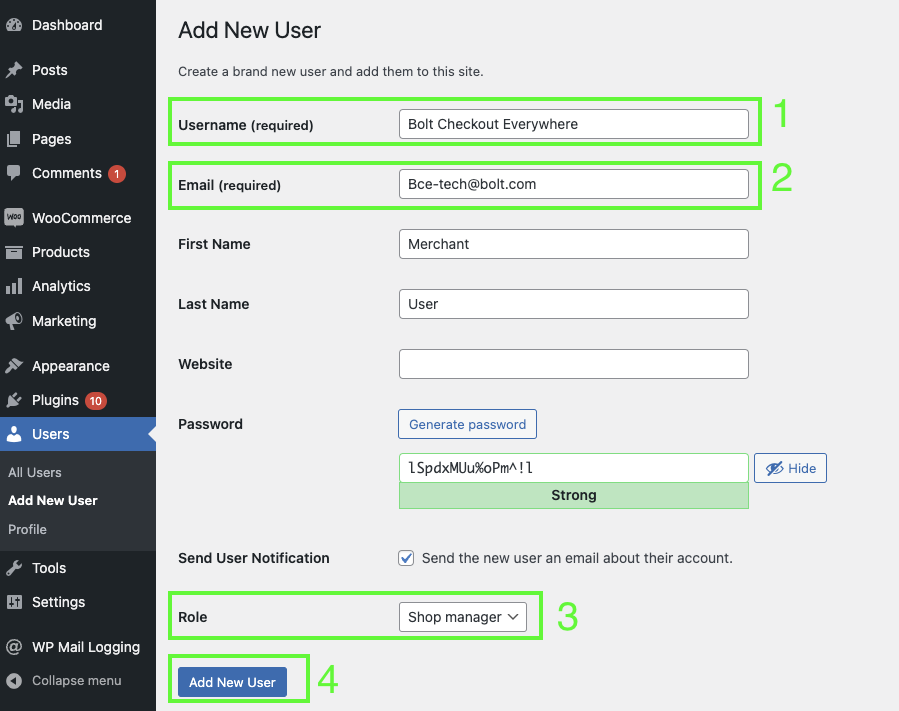
- Add a username (we recommend “Bolt Checkout Everywhere Integration”) and email (dev@bolt.com).
- Choose Shop manager in the Role section.
- Click Add New User.
Step 2: Generate API Key
- Go to Settings > Advanced > REST API.
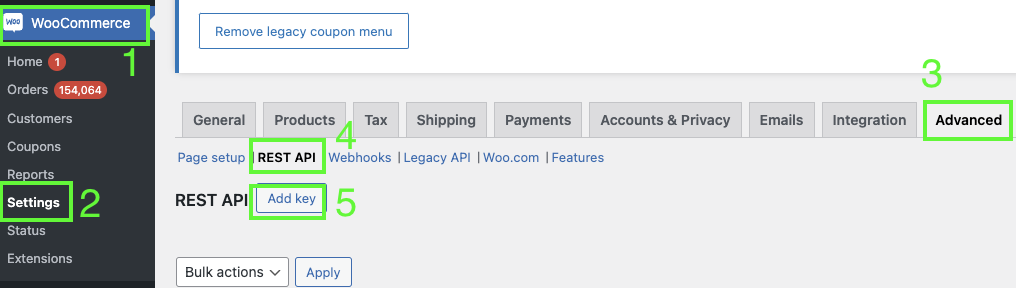
- Click Add key.
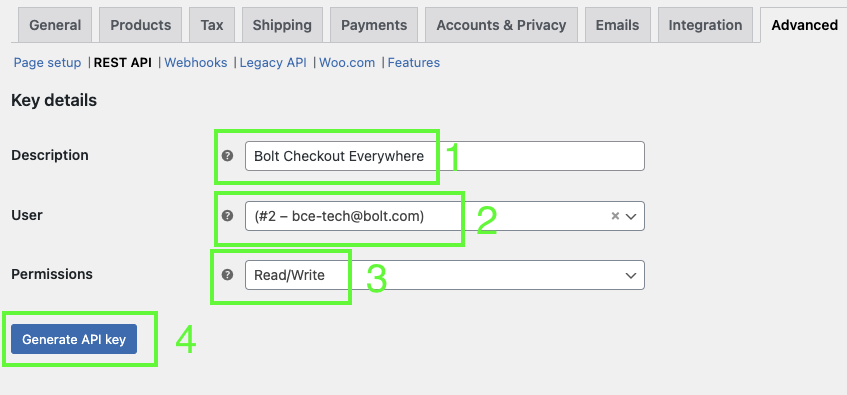
- Add description.
- Select the “Bolt Checkout Everywhere Integration” user.
- Set “Read/Write” access.
- Click Generate API key.
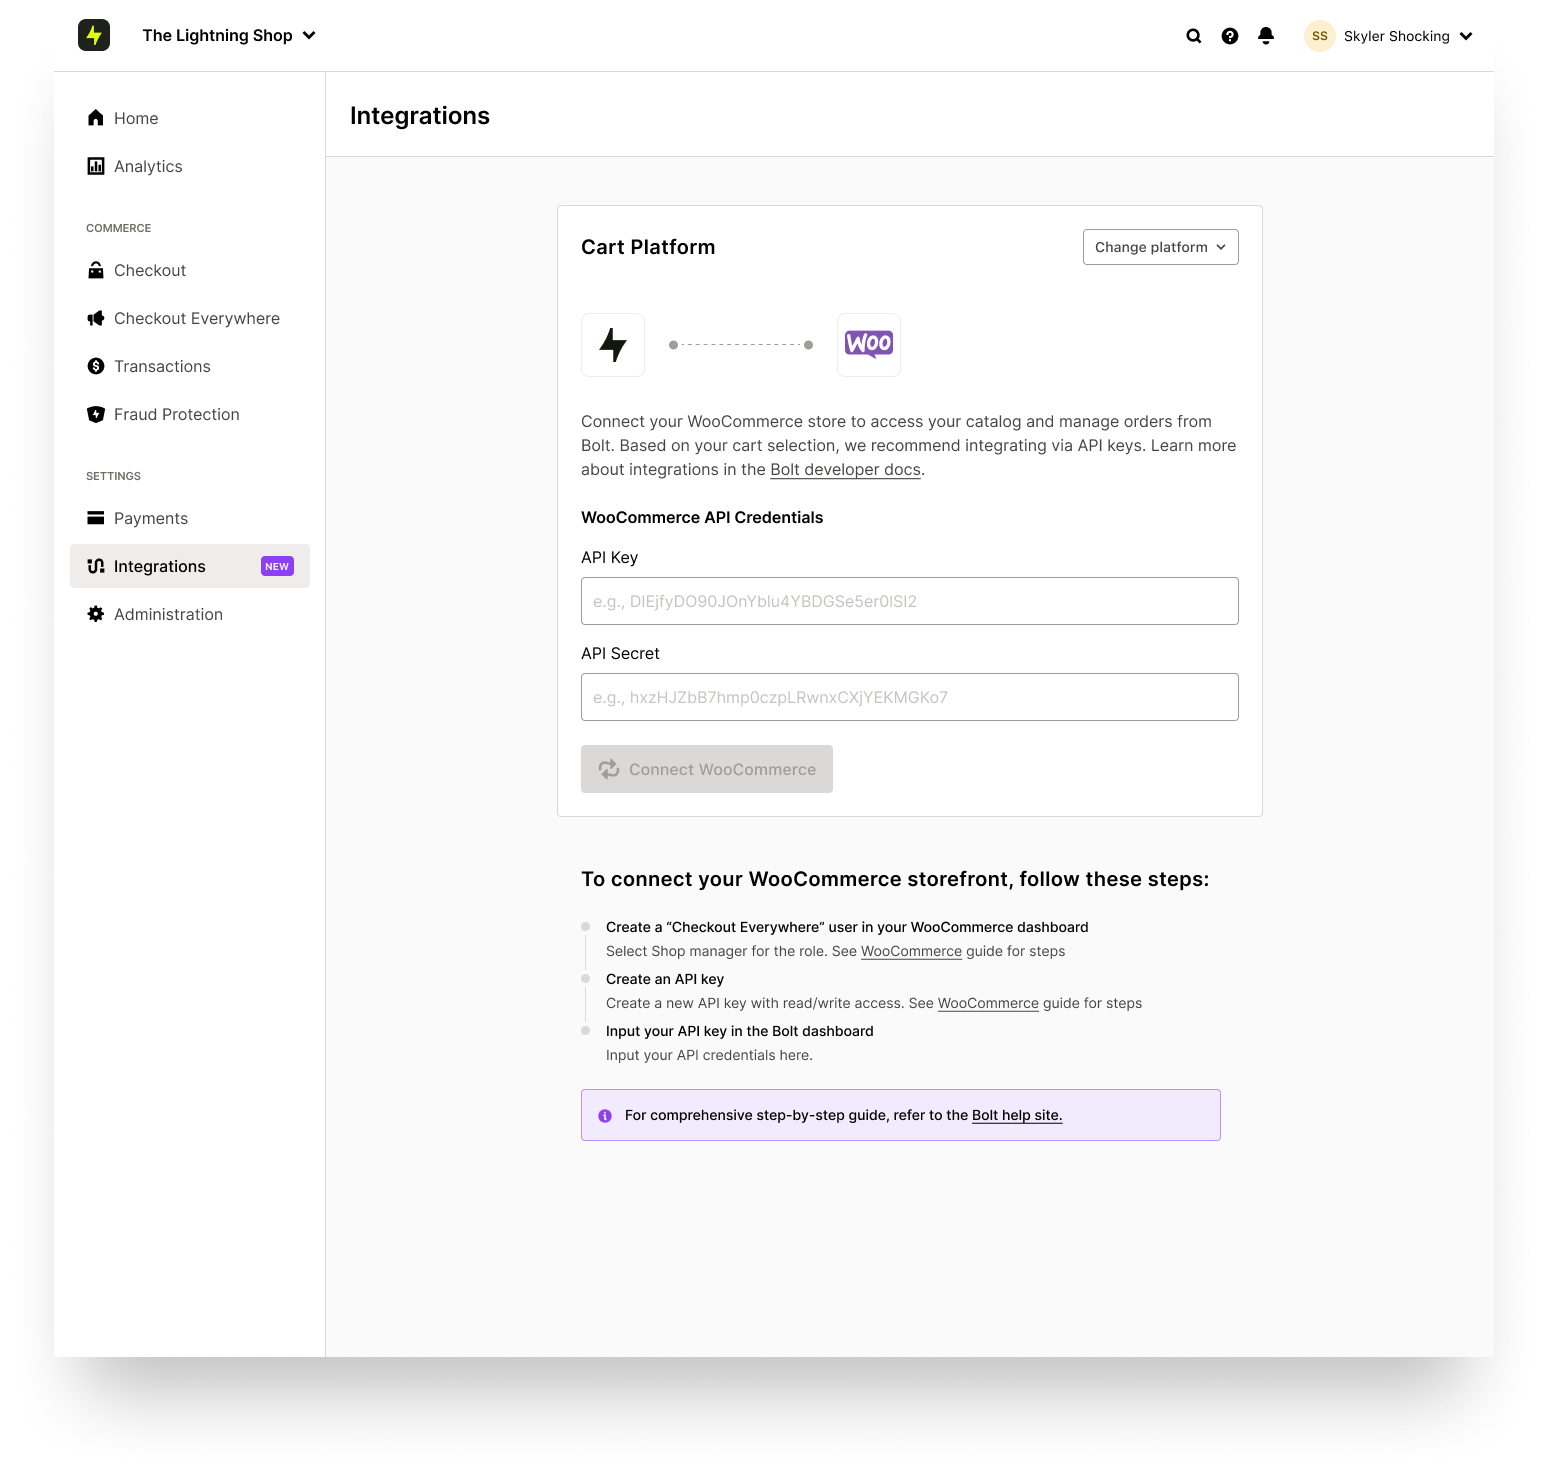
Step 3: Fill WooCommerce Information in Bolt Merchant Dashboard
- Go to the Bolt Merchant Dashboard. Go to Integrations and select WooCommerce.
- Enter your API Key and API secret.
- Click Connect Adobe Commerce. You will see your product catalog count increase as the stores successfully connect.
Step 4: Set Up Payment Processor
If you already have Bolt Checkout, Accounts, or Ignite set up, you can skip this step! If you’re new, follow the instructions in our Payment Processor articles to set up your specific payment processor.
Step 5: Configure Your Checkout
If you already have Bolt Checkout, Accounts, or Ignite set up, you can skip this step! If you’re new, follow the instructions listed below to configure your checkout:
- Enter store and support information.
- Add store logo.
- Other checkout settings as found in your dashboard.
Step 6: Create your Checkout Links
Go to the dashboard and follow the instructions found in our Create Checkout Links article to start using Checkout Everywhere.